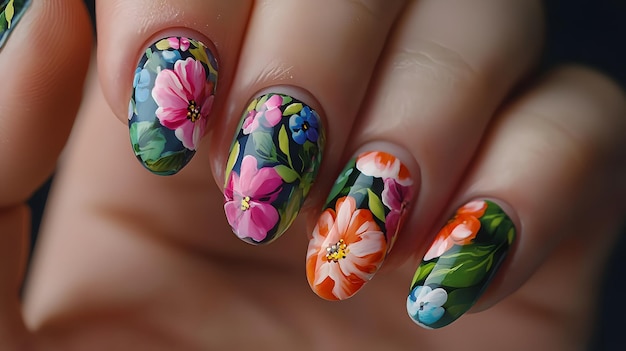
Blooming gel nail designs are popping up everywhere because they give your nails that soft, flowy look like colors are dancing together. I've messed around with all kinds of nail stuff over the years, and this one's a game-changer for anyone who wants pretty nails without the hassle. No more boring single shades – these let you play artist in under an hour.
Why Blooming Gel Feels Like Magic
Picture dropping a bit of color into water and watching it spread out nice and gentle. That's blooming gel. You lay down your base, add a thin layer of the special gel, drop some colors on top, and they blend on their own before you set it with the light. It's not like regular polish that just stays put; this moves and mixes for that hazy, dreamy finish.
I remember the first time I tried it on a lazy Sunday. Grabbed some pinks and purples, and boom – nails looked like they came from a fancy salon. Lasted through a whole week of cooking and cleaning, no chips. Folks started asking where I got them done, and I'd just grin.
The best part? It works on short or long nails, natural or fake tips. Perfect for busy days when you need a pick-me-up.
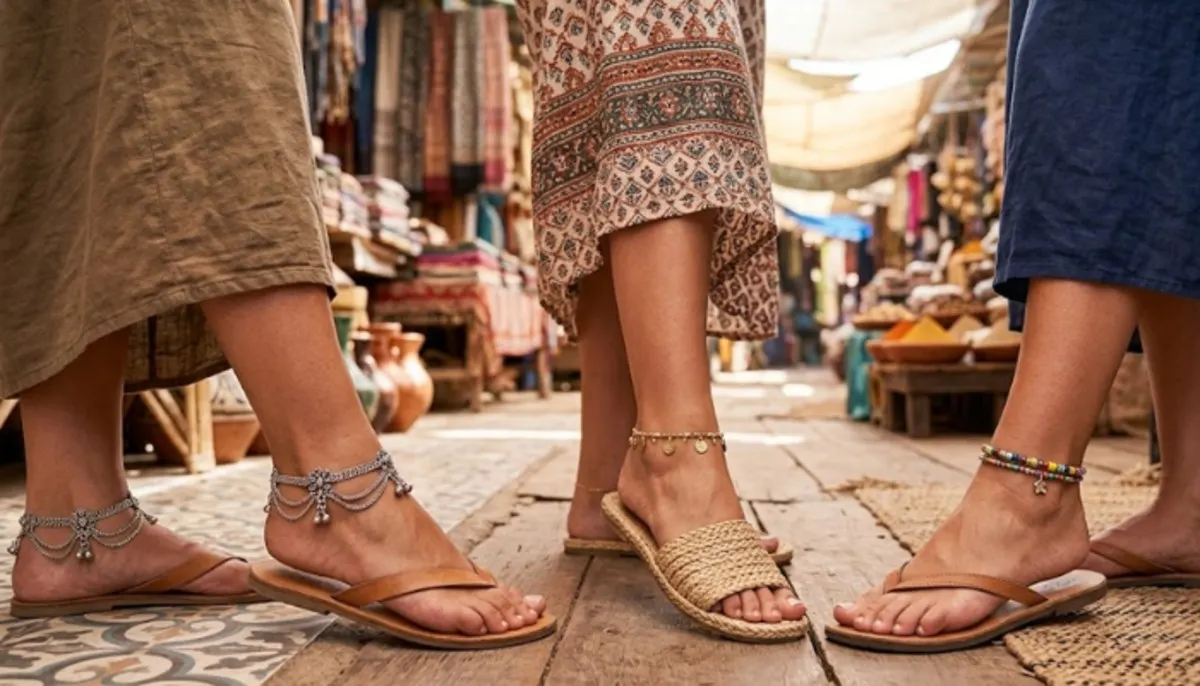
Read More: Wide Leg Pants Fashion Trend Ideas for Stylish Women

Perfect Timing for Blooming Gel Fun
Everyone's into nails that say something about you these days. Blooming designs fit right in – quick to do, tough enough for real life. Here in Delhi, with all the dust and sweat, regular polish flakes off fast, but this holds strong. Costs next to nothing too; one bottle does tons of sets.
My sister does them for her kids' parties. Subtle ones for school runs, brighter for fun nights out. Once you get the hang, you'll switch everything over.
How to Make Blooming Gel: Easy Steps Anyone Can Follow
Don't overthink it. Nail prep is key, then it's smooth sailing. I've tweaked this over dozens of tries so you skip the goofs.
Round Up Your Basics
UV lamp, blooming gel base, a few gel colors, thin brush, top coat, and alcohol wipes. Shape your nails square or oval, nudge cuticles back soft-like. Buff just enough for grip.
Start with Base Layers
Rub on base coat, light for a minute. Two light coats of your main shade – say, a clean white – light each one. Keep 'em thin or the bloom won't flow right.
Lay Down the Blooming Part
Pat on a whisper-thin blooming gel layer. Shiny and wet – hold off on the light.
Drop and Watch the Colors Spread
Dip a tiny brush or dot tool in color. For simple blooming gel nail designs, just 3 dots do it. Love pink blooming gel nail designs? Pale pink under, then dots of rose, peach, a touch of sparkle. Give it 20 seconds; colors fan out pretty.
Warm room speeds it up, cool slows it. Test on scrap first if nervous.
Stack for More Wow
Light that layer, add another blooming gel smear, drop bolder colors like berry. Light again. Gets you depth without heaviness.
Lock It In
- No-wipe top, light it, wipe sticky bits. Oil those cuticles. All done in 40 minutes flat.
- If bubbles pop up, your gel's too thick – dab less next go. Wonky spread? Less blooming gel. Simple fixes.
Beginner-Friendly Simple Blooming Gel Nail Designs
Start small so you build confidence. These simple blooming gel nail designs use hardly any colors.
Gentle Center Fade
Pale base, blooming gel, one deeper shade dot smack in middle. Spreads to edges soft. Wore it daily; super chill.
Random Dots Party
Base color down, blooming gel up, little dots of white, soft pink here and there. Blooms to confetti look. Kid-approved easy.
Tip Bloom Twist
- Color base to mid-nail, blooming gel above, stroke contrast from tip in. Fresher than old French style.
- Did these for a family thing – everyone wanted pics. Zero stress.
Stunning Pink Blooming Gel Nail Designs
Pink just works wonders with blooming gel – turns girly into grown-up gorgeous.
Flower Patch Vibe
White start, blooming gel, three shades of pink dots. Swipe green lines for stems. Came out like a little garden. Matched my kurti at a mehendi spot-on.
Berry Blend Fun
Bright pink base, blooming gel, white swirls and red pops. Green bits at bottom like fruit. Felt summery all monsoon.
Layered Petal Softness
- Nude under, blooming gel, pink petal blobs fading mauve. Sparkle flecks after for shine. Office to dinner ready.
- Pinks don't fade in our heat like lights do. Blend with neutrals for everyday safe.
Bold Colorblock Blooming Gel Ideas
- Want punch? Block colors that melt together.
- Base teal-ish, blooming gel, fat stripes of yellow, pink, navy. Soften to wild patterns. Striping brush keeps lines straight.
- Row by row for stripes – light between if crisp wanted. Holi nails? These stole the show.
Tip: Opposites bloom wildest. Deep blue, electric pink – yes please.
Watercolor-Style Blooming Gel Nails
- Feels like finger painting but pro.
- Nude base, blooming gel, swooshy strokes blue-pink-gold. Nudge blend early. Layers overlap like real washes.
- Black liner after top for pop if you like. Rainy day mood lifter.
- Tried starry swirls once – blue-yellow dots. Looked artsy; friends raved.
Tie-Dye Blooming Gel Manicures
- Party nails easy-style.
- White base, blooming gel, spaced color blobs purple-pink-blue. Pull from each to middle post-spread. Twisty goodness.
- Big small blobs for real deal. Matte top for edge. Festival danced through no problem.
- Go six colors bold. Gaps keep clean.
Swirly Abstract Blooming Gel Looks
- Pro feel, kid simple.
- Gray base soft, blooming gel, skinny pink-teal-white curls. Long wait mixes heavy; quick sets sharp.
- Dots or shine bits extra. Marble with black-gold on pink? Chef's kiss.
Everyday Tips for Flawless Blooms
- Fan helps humid slow-downs. Alcohol cleans brushes. Fridge keeps gel fresh.
- Oops? Acetone off uncured redo.
- Stencil practice, watch vids for timing feel.
Fixes for Goofs We All Make
- Gel overload drowns color – skimpy next.
- Hurry light flattens – 20-second count.
- Prep skip chips – buff proper.
- Pinks yellow? Full lights each.
- Learned hard way.
My Go-To Supplies List
- Mylee or similar blooming gel cheap. Solid lamp, good pinks from local shops. Dot tools pennies.
- Kit runs 2500 tops, saves salon cash quick.
You May Read Also: Puddle Pants: The Trendy Wide-Leg Style You Need

Skin Tone Matches for Blooms
- Light skin: Pastels glow.
- My medium: Warm pinks sing.
- Rich tones: Gems like pink-ruby mixes.
Swatch first always.
Seasonal Blooming Gel Switches
- Heat: Neon pink-white.
- Rains: Faded flows.
- Fests: Gold-pink haze.
- Shaadis: Rose fields.
All-year player.
Keeping Them Fresh Longer
- Daily oil, mild wash. Day-two soak-free.
- Two-week rebase. Acetone buff remove gentle.
Three weeks possible.
Why Blooming Tops Other Nail Tricks
- No stickers, pure flow. Less mess than powders.
- Yours alone each time. Wallet win.
- Crew copies me now.
Next-Level Blooming Tricks
- Shine over wet bloom chrome.
- Thick dots half-light 3D.
- Black base neon galaxy glitter.
- Basics first then fly.
Blooming Gel Quick Compare
| Thing | Blooming Gel | Plain Gel |
|---|---|---|
| Look | Blended art | Flat shade |
| Easy? | Yes for newbies | Super basic |
| Time | 40-50 min | 25 min |
| Hold | 2-3 weeks | 2 weeks |
| Cost | Little more | Cheaper |
Hot Pink Blooming Combos
- Blush-lavender sweet.
- Hot-white fun.
- Rose-nude posh.
- Magenta-sea bold.
Your Blooming Gel Questions Answered
1. Can I do blooming gel on natural nails without tips?
Sure thing, natural nails work great as long as you prep them right. File smooth, buff a tad, and push cuticles back gently. No need for extensions unless you want extra length – the bloom effect shines on short real nails too. Just make sure they're dry and oil-free before starting.
2. Is there any allergy risk with blooming gel products?
Allergies are pretty rare, but smart to patch test first. Dab a bit on your skin near the nail, wait 24 hours. If no redness or itch, you're good. I know a friend who reacted to regular gels but blooming ones were fine – probably the thinner formula. Stick to known brands and use gloves if sensitive.
3. Will blooming gel designs look good on super short nails?
Absolutely, short nails are perfect for blooming gel nail designs. The colors spread small-scale, no waste of space. Try a center dot fade – it fits tiny beds like a glove. I've done them on bitten-down nails for a cousin, turned out adorable and grew out strong.
4. Do I really need a UV or LED lamp for this?
Yep, lamp's a must – no skipping it. Blooming gel sets with UV light to lock colors and make it chip-proof. Get a cheap 48W LED one; cures fast, under a minute per layer. Without it, everything smears off in a day. Mine's from a local market, works like a charm.
5. How do I remove blooming gel without wrecking my nails?
Soak in pure acetone for 10-15 minutes, then gently scrape or roll off with a wooden stick. Buff lightly after, oil up. Don't pick – ruins the nail bed. Takes patience first time, but gets quicker. I do mine every two weeks, nails stay healthy.
6. Can kids or teens try simple blooming gel nail designs safely?
Older kids, sure – teens love it. Watch them close with the lamp and tools; no little ones near acetone. Use non-toxic gels, keep sessions short. My niece, 12, does dots with me – builds fine motor fun. Just supervise and skip strong colors.
7. How long do blooming gel nails really last with daily wear?
14-21 days easy if you care right. Oil cuticles daily, avoid harsh cleaners first week. In Delhi heat, mine hit three weeks typing and cooking. Grow-out shows slow thanks to the blend. Rebase if tips lift early.