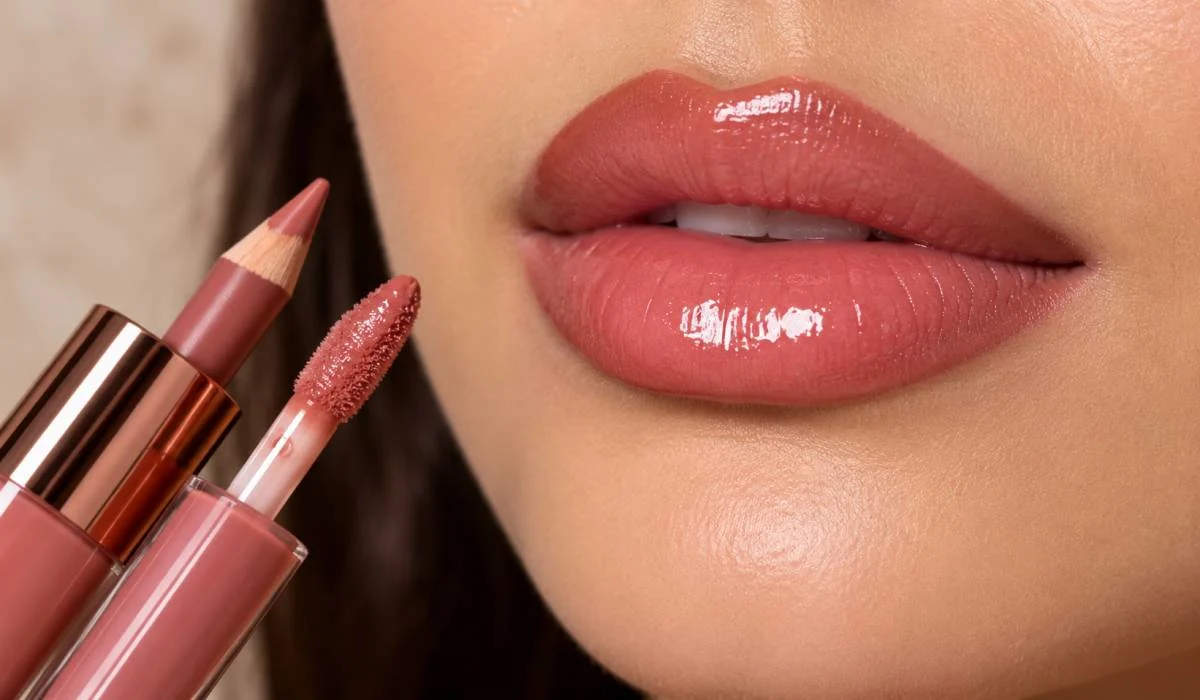
Glossy lips look easy, then you try it and your hair sticks to your mouth, or the gloss slides off in twenty minutes, or it bleeds past the lip line and looks like you ate something oily. I wore gloss badly for years, then I learned three things, prep matters, liner matters and the middle is the only place that should shine, that is the whole method.
This glossy lips makeup tutorial is for people who have failed before, seven steps, five products, one cotton bud, no fancy tools, just a base that holds and a shine that stays.
First, Know What Glossy Lips Are
Shiny lips, Wet look Light reflects off the surface. That is it.
The effect. Lips look fuller. Plumper. Younger. That is why gloss is back after years of matte everything.
But gloss has a problem. It does not stay. Two hours max. Sometimes less. So the prep and the base matter more than with any other lip product. Also Gloss shows every dry patch, Matte hides texture, Gloss highlights it. So if your lips are flaky, fix that first. No gloss on earth saves cracked lips.
Read More: Best Makeup Brushes: Simple Guide for Every Need
Glossy Lips Makeup Tutorial Step by Step
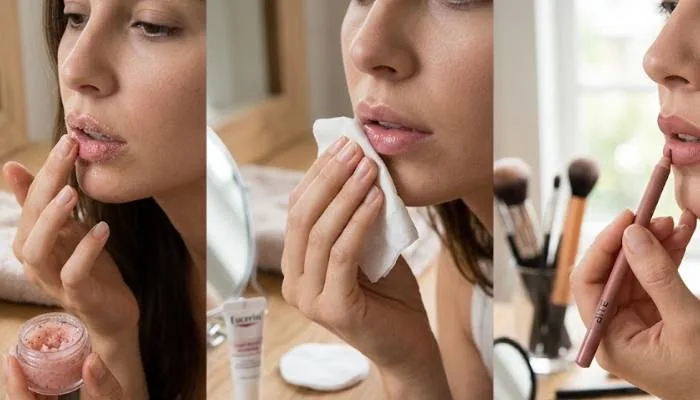
Follow this order. Do not skip steps.
- Step 1. Scrub the lips. Wet toothbrush. Gentle circles. Thirty seconds. Or use a lip scrub. Remove the dead skin. This is the step everyone skips. Then they wonder why the gloss looks lumpy.
- Step 2. Apply lip balm. Thin layer. Wait five minutes. Then blot the extra off with a tissue. Do not leave it wet. Gloss will not stick to a slippery balm base.
- Step 3. Apply lip liner. This is the secret. Not for shaping. For holding. Liner stops the gloss from bleeding past the lip line. Fill the whole lip with liner, not just the outline. The liner becomes the base. The gloss sits on top.
- Step 4. Apply a lipstick. Yes, lipstick under gloss. A shade close to your natural lip or the gloss colour. This gives the gloss something to hold onto. Gloss alone fades in an hour. Gloss over lipstick lasts three to four.
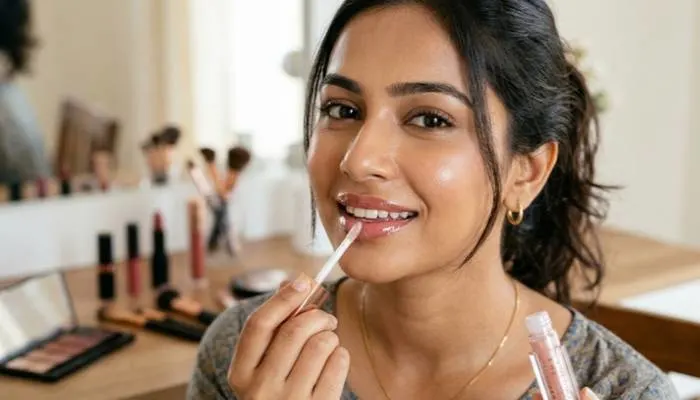
- Step 5. Apply gloss. Centre of the lip only. Not the corners. Not the edges. The middle. Press, do not swipe. Swiping moves the lipstick underneath.
- Step 6. Blot once. Light press with a tissue. Then one more layer of gloss. This builds lasting shine.
- Step 7. Clean the edges. Cotton bud. Small amount of concealer. One swipe around the lip line. Sharp edges make the whole look.
Seven steps. First time takes eight minutes. After that, four.
Lips Makeup Step by Step
Gloss is not the whole lip routine. Here is the full order for any lip look.
- Scrub
- Balm
- Blot
- Liner
- Lipstick
- Gloss
- Clean edges
That is the universal order. Whether you want glossy, matte, or stained lips, the first three steps are the same.
The only thing that changes is step six. Gloss for shiny. Nothing for matte. Balm for natural.
Beginners get this wrong. They start with colour. Then the lips are dry and the colour sits in the cracks. Prep first. Always.
Lip Makeup Products List
You do not need ten products. Five is enough.
- Lip scrub. Or a wet toothbrush. Free. Works the same.
- Lip balm. Any basic one. Vaseline works. So does a medicated balm if your lips crack often.
- Lip liner. Nude or matching your lip colour. Not dark. Dark liner with light gloss looks dated.
- Lipstick. Any finish. Cream or matte. This is the base for gloss.
- Lip gloss. The main product. Tube or wand. Wand is easier for beginners.
- Cotton buds. For cleaning edges. Keep them nearby.
That is six things, and one is free. Nobody needs a twelve step lip routine.
One optional extra. A lip primer. Only if your lips are very lined. Gloss settles into lines. Primer fills them. But it is not necessary when you start.
Glossy Lips Makeup Tutorial for Beginners
If the seven step version feels like too much, here is the shortcut.
The three minute version.
- Balm. Wait one minute. Blot. Liner all over the lips. Gloss in the centre. Done.
- Skip the lipstick. Skip the powder. Skip the concealer cleanup. It will not last four hours. It will last two. But it looks good for a dinner.
The one product version.
- Tinted lip gloss. One product. Apply. Done.
- This is what I use on busy mornings. No liner, no lipstick. Just gloss with a bit of colour. It fades fast. But it takes ten seconds.
The finger version.
- Gloss on your finger. Dab in the centre. Press. Not swipe. The finger gives more control than the wand. Good for beginners who apply too much.
- Start with the three minute version. Do it ten times. Then move to the full seven steps when you want longer wear.
Lip Makeup Styles
Glossy is one style. Here are the others, and when to use them.
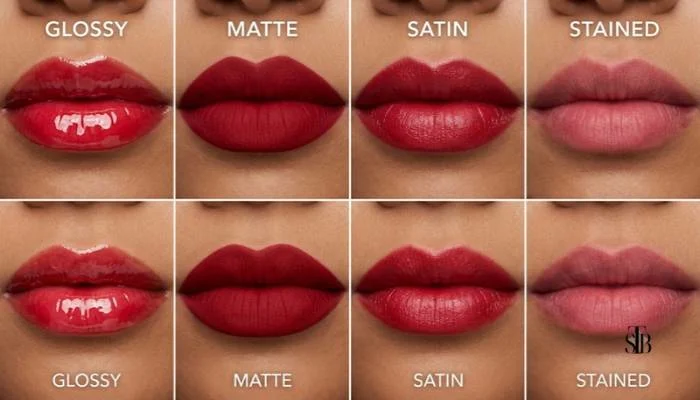
- Glossy. Shiny. Full look. Best for evenings, photos, dates.
- Matte. No shine. Long lasting. Best for work, long events, humid days.
- Satin. In between. Slight shine. Best for daily wear.
- Stained. Colour soaked into the lip. No product on top. Best for casual days, no touch up needed.
- Ombre. Two shades. Dark corners, light centre. Best for weddings, parties.
- Nude. Close to your natural lip. Best for office, interviews.
- Bold. Red, berry, deep pink. Best for evenings, events.
Pick the style for the occasion. Glossy at a job interview looks odd. Matte at a wedding looks flat.
Gloss works best when the rest of the face is simple. Heavy eye plus glossy lip is too much. Pick one to be heavy not both.
You May Read Also : How to Get Rid of Tanning on Face: Easy Tips That Work
Common Mistakes
- Gloss on dry lips. Looks lumpy. Scrub first.
- Gloss on bare lips. Fades in an hour. Use liner and lipstick under.
- Gloss on the corners. Bleeds. Looks messy. Centre only.
- Too much product. One layer is enough. Two thin layers beat one thick one.
- Dark liner with light gloss. Dated look. Keep liner nude or matching.
- Swiping instead of pressing. Moves the base. Press the wand.
- Not cleaning the edges. Gloss travels. One cotton bud fixes it. Do it last.
- Gloss in the hair. Real problem. Pull hair back first. Or use a thicker gloss that does not string.
Quick Table
| Style | Lasts | Best for |
|---|---|---|
| Glossy | 2-3 hours | Evenings, photos |
| Matte | 6-8 hours | Work, long events |
| Satin | 4 hours | Daily wear |
| Stained | 5 hours | Casual days |
| Ombre | 4 hours | Weddings, parties |
Last Thing
Gloss is the last step, not the first. Scrub, balm, blot, liner, lipstick, gloss, clean edges.That order fixes most gloss problems before they start, and keep a cotton bud in your bag, gloss travels, you will need it.
FAQs
1. What is glossy lips makeup?
Shiny lip look. Light reflects off the surface. Lips look fuller. Lasts two to three hours only.
2. How do I do glossy lips step by step?
Scrub. Balm. Blot. Liner all over. Lipstick. Gloss in the centre. Clean edges. Seven steps. Four minutes once you practice.
3. Why does my gloss bleed past my lip line?
No liner. Fill the whole lip with liner first. Gloss on the centre only. Not the corners. That fixes it.
4. Can I skip lipstick under gloss?
You can. But gloss fades in an hour on bare lips. Lipstick under gives three to four hours. Worth the extra step.
5. Which gloss is best for beginners?
Wand applicator. Slightly thick formula. Watery gloss travels and bleeds. Thick gloss stays where you put it.
6. Why does my gloss look patchy?
Dry lips. Dead skin shows under shine. Scrub first. Balm. Blot. Then gloss. Matte hides texture. Gloss does not.
7. How do I stop hair sticking to my lips?
Use less product. Two thin layers, not one thick. Thick gloss strings. Pull hair back. That is all.
8. How long does glossy lip makeup last?
Two to three hours with lipstick underneath. One hour on bare lips. Carry the gloss. Reapply after meals. Normal, not a failure.